Make a mold from your design
Design the piece you want to cast (a soap bar, a coaster, a badge, a chocolate), then let the app build the mold around it. Two kinds, both under Project → Mold. Pass · Maker · Seller
| Print mold | Silicone box | |
|---|---|---|
| What you print | The mold itself: a block with your design cut into it | Your design standing in an open box |
| Then | Pour straight into the printed mold | Pour silicone over it; the cured silicone is your mold |
| Good for | Melt-and-pour soap, plaster, concrete, resin (with mold release), a few casts | Chocolate and candy (food-grade silicone), candles, resin, many casts, fine detail |
| Mold is | Rigid plastic | Flexible silicone, so pieces pop out easily |
Print mold
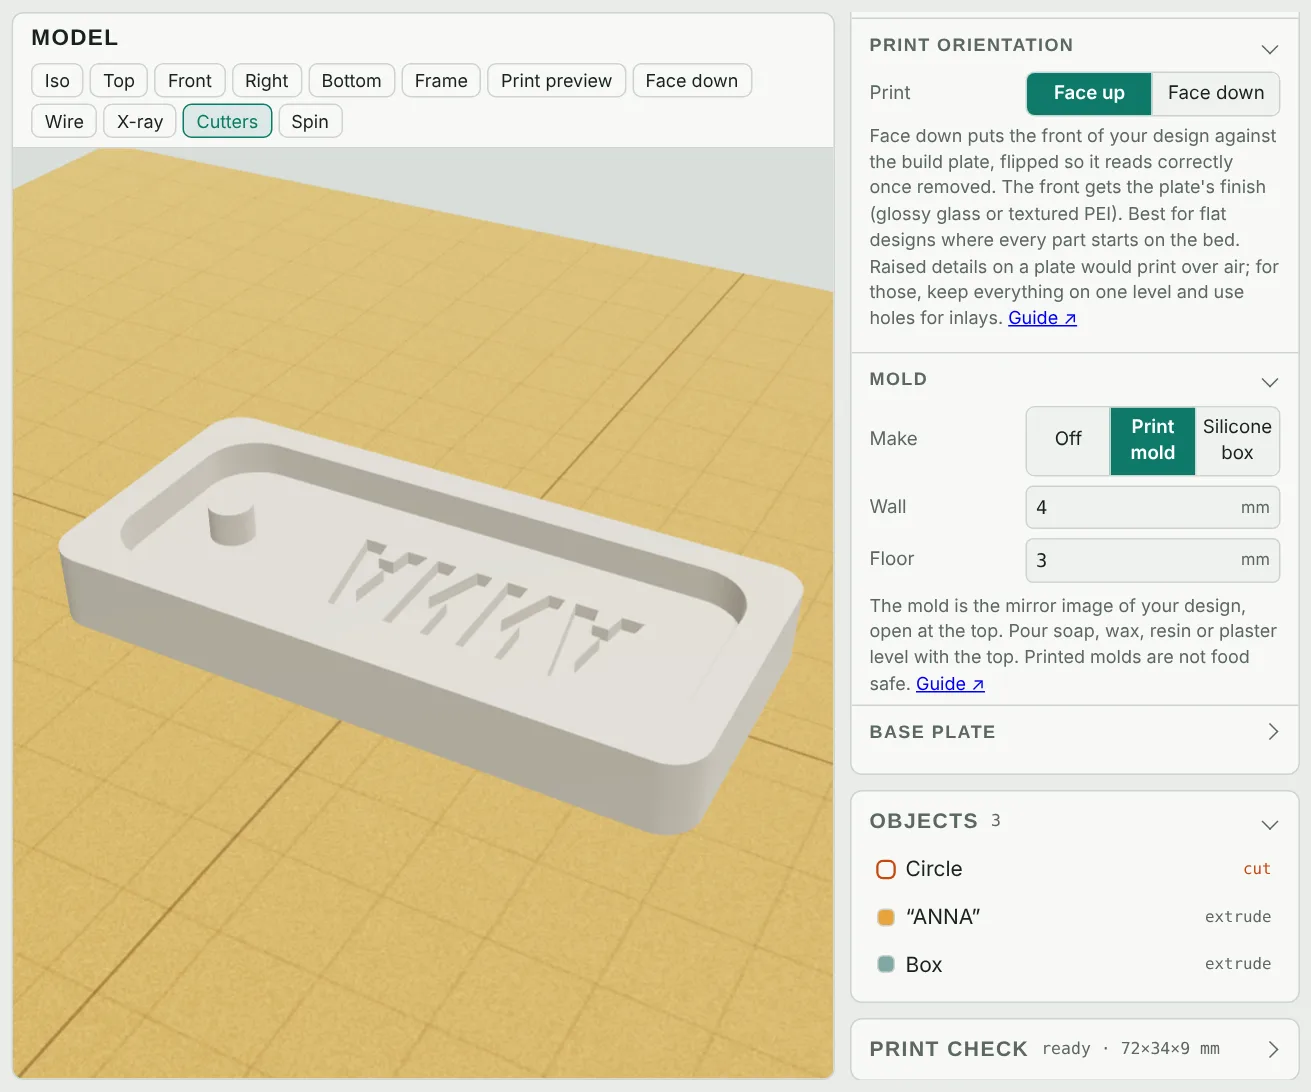
- Design the piece as you want it to come out, flat back down on the bed.
- With nothing selected, open Mold in the Project panel and choose Print mold. The 3D view now shows the mold, and a dashed outline in the sketch shows its size.
- Set the Wall (the rim around the cavity) and Floor (under the deepest part). 3–5 mm walls and a 2–4 mm floor are sturdy.
- Export. The file is named "… - mold" and contains only the mold.
- Pour level with the top of the mold. The Print check shows how much each casting takes.
Heat: PLA softens at around 55–60 °C, so hot wax or soap can warp it. For hot pours, print in PETG or ASA, or use the silicone route. Printed plastic is not food safe.
Silicone mold box
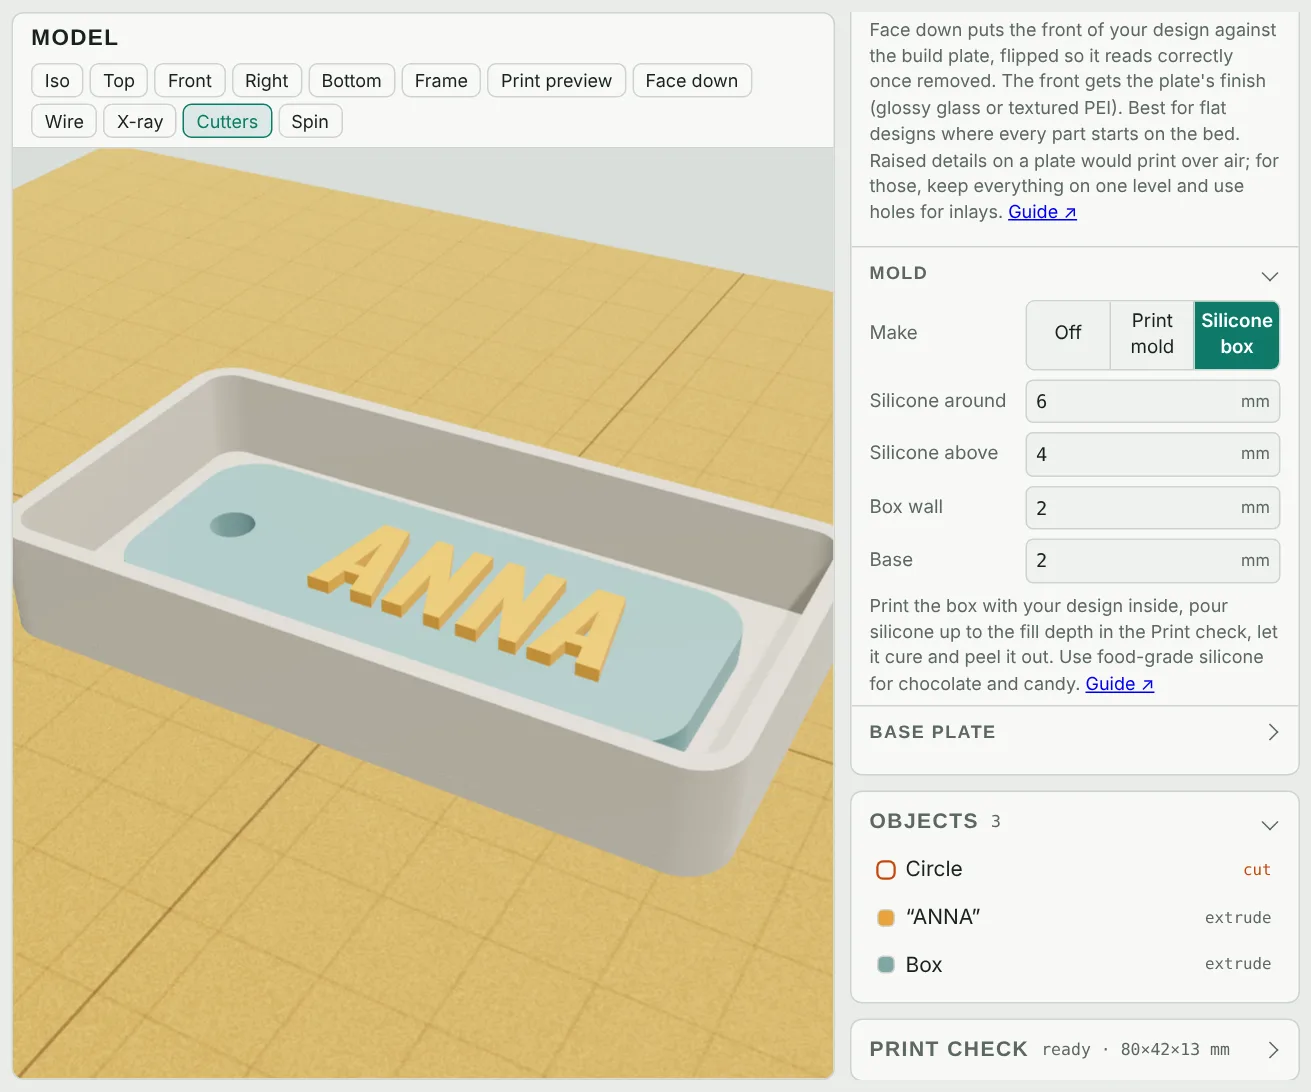
- Choose Silicone box under Project → Mold.
- Set Silicone around (the gap between design and wall, 5–8 mm) and Silicone above (3–5 mm over the highest point), plus the printed Box wall and Base.
- Export and print. The box and the master print as one piece.
- Mix the amount of silicone shown in the Print check plus about 10%, pour slowly into one corner and fill to the depth shown.
- When it has cured, peel the silicone out. Its underside is your mold.
Food: for chocolate, candy or anything edible, use a food-grade (platinum-cure) silicone and follow its instructions. Some silicones cure poorly against certain prints; seal the print with a clear coat first if your silicone recommends it.
Tips for clean castings
- Release: straight sides hold on tight. Set Top scale to 95–98% so the piece is slightly smaller on top and slides out of a rigid mold.
- Smooth surfaces: print with fine layers (0.12–0.16 mm). Every layer line shows up in the casting, especially in silicone.
- Holes become posts: a hole in your design (a key ring, a hanging hole) becomes a post in the mold, so the casting comes out with the hole already made.
- While a mold is on, the export and the 3D view show the mold. Switch Mold back to Off to see and export the design itself.
Questions
Can I make two-part molds for round objects?
Not yet. The mold maker makes open-face molds, which suit anything with a flat back. Two-part molds for fully round shapes are on our list.
How much silicone do I need?
The Print check shows the silicone volume and the fill depth for your box. Mix about 10% more to allow for what stays in the cup.