Home / Guide / Getting started
Guide 1 of 11Your first print in five minutes
Extrudable3D turns flat drawings into solid 3D models. You draw from the top, like on paper, and each shape grows upward into a part you can print. Nothing to install: it runs in your browser and your work is saved as you go.
Make a name tag
- Open the app. A sample project shows what is possible; press Clear for an empty bed (you can bring the sample back with Undo).
- Pick the Box tool (R) and drag on the sketch to draw a rectangle about 60 × 25 mm. Let go and it appears in 3D.
- In the panel on the right, set Height to 3 mm and Corner radius to 4 mm.
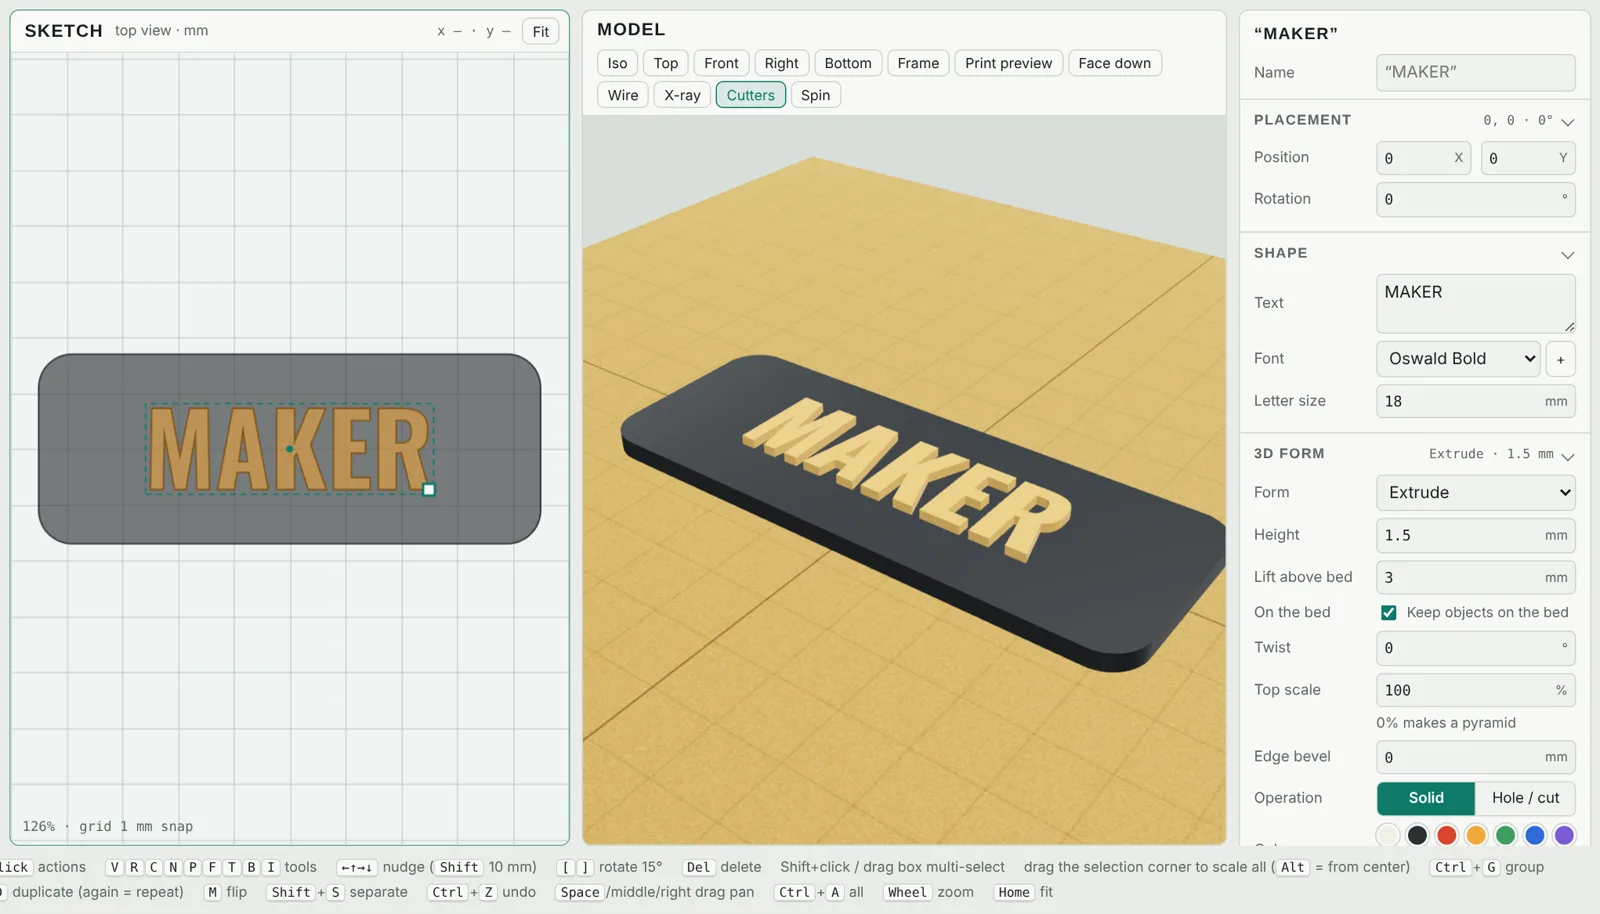
- Pick the Text tool (T), click on the tag and type a name in the panel. Set its Height to 1.5 mm and Lift above bed to 3 mm so it sits on top of the tag.
- Choose your printer under Project → Printer bed so the bed matches yours (see Printer setup).
- Click STL at the top to download the file, then open it in your slicer (Bambu Studio, PrusaSlicer, OrcaSlicer, Cura…) and print.
Your work is saved automatically in this browser, so you can close the tab and come back. To move a design to another computer, use Save to download a project file and Open it there.
What to read next
- A tour of the screen: where everything is.
- 3D forms: twist, taper, vases and hollow containers.
- Holes and cutouts: add a key-ring hole.
Questions
Do I need an account?
No account is needed to design. The first time you export, the app asks for an email address so it can keep your free account. Your files download straight to your device.
Which units does it use?
Millimetres, the same as your slicer and printer. 25.4 mm is one inch.